Garage door maintenance is an often overlooked detail in home upkeep. Did you know a damaged or worn-out garage door bottom seal can let in pests, dust, water and cold air? This blog offers a simple step-by-step guide to help you replace that faulty seal with ease.
Key Takeaways
- Use a razor knife to remove the old seal from the channels on either side of the garage door.
- Clean and prepare the channels by removing any dirt or debris with dish soap and water.
- Install the new rubber seal by positioning it in one of the channels, pushing it firmly into place, and securing it with an aluminum retainer. Repeat on the other side of the door.
- Trim any excess length from the seal using a utility knife or razor knife.
Tools and Materials Needed to Replace Garage Door Seal
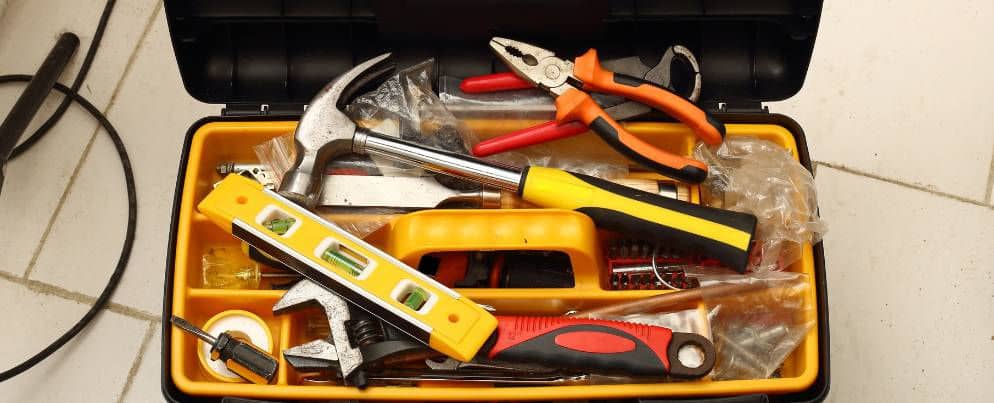
List of tools and materials required for the replacement process
To replace a garage door bottom seal, you will need the following tools and materials: a razor knife, dish soap, an aluminum retainer, channels for the seal, a replacement rubber seal, a measuring tape, and a utility knife.
Step-by-Step Guide on How to Replace a Garage Door Bottom Seal
In this step-by-step guide, you’ll learn the easy and effective process of replacing a garage door bottom seal. Don’t miss out on these helpful instructions to ensure a proper installation!
Step 1: Remove the old seal
To begin the process of replacing your garage door bottom seal, start by removing the old seal. Use a razor knife to carefully cut through the rubber seal and remove it from the channels on either side of the door.
Wipe down the channels with dish soap and water to ensure they are clean and free from any debris. This will help create a smooth surface for installing the new replacement bottom garage door seal.
Step 2: Prepare and clean the channels
Cleanliness is key when replacing a garage door bottom seal. Before installation, take the time to thoroughly clean and prepare the channels where the new seal will be placed. Use a damp cloth or sponge with dish soap to remove any dirt, debris, or old adhesive from the channels.
Make sure they are completely dry before proceeding with the replacement process. This step will ensure a smooth and secure fit for the new seal, keeping your garage well-insulated and protected from outside elements.
Step 3: Install the new replacement bottom garage door seal
To install the new replacement bottom garage door seal, start by positioning the rubber seal in one of the channels at each end of the garage door. Push it firmly into place, making sure it fits snugly.
Then, slide the aluminum retainer over the rubber seal and into the channel until it is secure. Repeat this process on the other side of the door. Once both sides are done, close and open your garage door a few times to check for any gaps or loose sections.
If everything looks good, you’re all set with your new bottom garage door seal!
Step 4: Trim the seal
To trim the seal, use a utility knife or razor knife to carefully cut off any excess length. Start at one end and make smooth, precise cuts along the seal. Take your time to ensure a clean and even cut.
Make sure not to trim too much off, as you want the seal to fit snugly against the bottom of the garage door. Once you have trimmed the seal to the desired length, move on to finalizing the installation process.
Step 5: Wrap up and additional measures
To wrap up the garage door bottom seal retainer replacement process, make sure the new seal is securely attached and fits snugly in the channels. Double-check that you have trimmed any excess rubber and cleaned up any debris or dirt from the area.
As an additional measure, consider applying a silicone-based lubricant to the channel edges to prolong the lifespan of your new seal. Regular inspections and maintenance will help ensure that your garage remains protected from drafts, pests, and water damage.
By following these steps and taking preventive measures, you can keep your garage door functioning properly and maintain a secure environment for your belongings.
Common Issues and Troubleshooting
Common issues that may arise during the replacement process
During the garage door bottom seal replacement process, there are a few common issues that may arise. One problem could be uneven channels, which can prevent the new seal from fitting properly.
To fix this, use pliers to straighten any bent channels before installing the new seal. Another issue could be difficulty removing the old seal due to it being stuck or hardened over time.
In this case, apply WD-40 or another lubricant to loosen it up and make removal easier. Finally, if you notice gaps or air leaks after installing the new seal, check for any obstructions in the channels and make sure they are clean before trying again.
Troubleshooting tips for effective seal replacement
If you encounter any issues during the garage door bottom seal replacement process, here are some troubleshooting tips to help you out. Firstly, if the new seal doesn’t fit properly into the channels, double-check that you have purchased the correct size of replacement seal.
Sometimes, using a lubricant like dish soap can make it easier to slide the seal into place. Additionally, if your garage door opener is causing interference with the placement of the seal, try adjusting its position or consult with a professional for further assistance.
Lastly, ensure that there are no gaps or tears in the new seal after installation to maintain an effective barrier against drafts and pests.
Conclusion
Replacing the bottom seal of your metal or wood door is a simple and cost-effective way to improve energy efficiency, protect your garage floor, and defend against pests. With just a few tools and some basic steps, you can easily replace the old seal with a new one.
By following this guide, you’ll have a properly sealed garage door in no time. Say goodbye to drafts and hello to a more comfortable space!
FAQs
1. What is a garage door bottom seal?
A garage door bottom seal, also known as weather seal or gasket, helps insulate your metal or wood garage door and protect it from outside elements.
2. How do I replace my old garage door bottom seal?
You start by safely removing the old weatherstrip, then you proceed with installing the new garage door bottom seal according to the replacement instructions.
3. Can I repair my existing garage door seals instead of replacing it?
If the damage to your existing bottom seal is extensive, it’s generally better and more cost-effective to install a replacement rather than attempting repairs.
4. Does replacing a Garage Door Seal require special parts or tools?
Yes! A Garage Door Seal Replacement Kit usually comes with all necessary replacement parts and detailed installation instructions needed for successful DIY project.
5. Does changing my threshold affect how I replace my weather strip?
Absolutely! Altering your garage door threshold may change requirements for both insulation type and size when choosing a new rubber gasket.