Are you looking for a way to spruce up your house without spending too much money? Installing a garage door is an easy and cost-effective way of enhancing the value and aesthetic appeal of your home. With this guide, I’ll show you how to install a garage door yourself in just a few steps.
The DIY approach might seem intimidating at first, but don’t worry – it really isn’t that hard! With my expert advice and step-by-step instructions, you can have the perfect garage door installed before the weekend is over. Plus, taking on this project will give you a sense of accomplishment and satisfaction that comes from doing something yourself.
So grab your toolbox, roll up your sleeves and let’s get started! You’ll be surprised by what you can do when you put in some effort and follow these simple instructions.
Types of Garage Doors and Their Key Benefits
If you’re looking for easy maintenance and good looks, go for steel or aluminum sectional overhead doors – these are the most popular options and come in various panel designs including raised short panels, long flat lines and embossed woodgrain finishes. You also have the option of adding insulation to make your home more energy efficient.
If you prefer something unique, consider wooden carriage-style swinging/sliding doors made up of individual sections held together by torsion springs which provide resistance when opened or closed.

The weight is distributed evenly so they require minimal effort to open or close them.
If space is at a premium or you want your garage to blend into its surroundings opt for roll-up aluminium sheeting secured on either side by tracks.
Each type has its advantages but whichever style you choose there’ll be some form of hardware required such as hinges, handles and locks to ensure security.
No matter what look you decide upon, remember that quality materials should always be used when choosing components like door panels, torsion springs and track systems as this affects safety and performance over time. Now let’s move onto gathering the necessary tools and materials to get started…
Essential Tools and Materials You’ll Need
Now that you’ve chosen the perfect garage door, it’s time to get down to business. Before we begin, let’s take a look at the necessary tools and materials for installation. First up, you’ll need some basic garage door tools like pliers and a screwdriver set.
You’ll also need lag screws in various sizes to secure hinges and brackets during installation. To hang the top panel of the door, make sure you have appropriately sized steel cables on hand as well. Additionally, don’t forget about wood screws which are used to attach the bottom panel of your new garage door – these should be included with your purchase.
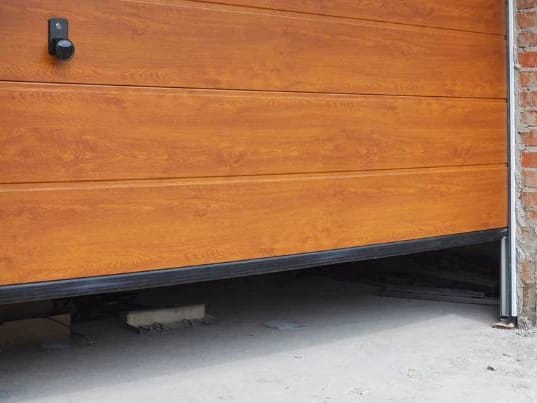
Finally, if you’re replacing an old door or installing one from scratch, pick up some weatherstripping tape too! This will help keep out drafts and provide extra insulation against extreme temperatures outside that could come in through the bottom door panel. With all these items in place, you’re ready to start taking measurements for installation!
How to Take Accurate Measurements for Installation
Did you know that most garage door repairs are related to improper installation? Ensuring your measurements are accurate is a critical part of the installation process. As an expert in the field, I’ll help guide you through this step-by-step so that you can install your garage door opener safely and correctly.
The first measurement needed for successful installation is for the width and height of your new garage door opening. Measure from wall stud to wall stud, making sure to measure both sides as well as the top of frame. Once these dimensions have been determined, cut two pieces of 2×4 lumber for framing if necessary based on the size of the doorway.
Next, it’s important to determine how much headroom will be required above the door opening before installing the header bracket onto ceiling joists or trusses. The header should be mounted securely and level with enough space between it and door panel when fully opened – typically 12 inches or more depending on design and manufacturer specifications.
This ensures smooth operation without any obstructions while also providing extra support against wind damage or other environmental forces.
Now that our measurements have been taken into account, we’re ready to move on to preparing our door frame!
How to Prepare the Door Frame Properly

Now that you’ve taken the measurements for your new garage door, it’s time to prepare the door frame. This is an important step in installing a garage door opener because you want to make sure everything fits together perfectly. Here are some things you need to do:
- Remove any trim or molding from around the opening of the frame.
- Cut down 2×4 boards and nail them along all four sides of the frame to give it extra support.
- Make sure they are level and securely fastened before moving on to the next step.
- Add insulation if necessary by using foam strips on both sides of the door panels and between each panel joint.
This will help insulate against noise and keep out drafts so your home stays comfortable year-round. Once you’ve finished preparing the door frame, it’s time to start putting together your new garage door!
You’ll need appropriate tools such as a drill, saw, screws, nails, shims, and other hardware depending on what type of garage door opener installation you’re doing – either manual or electric/remote control installation. Gather up all these items before getting started so everything goes smoothly during assembly!
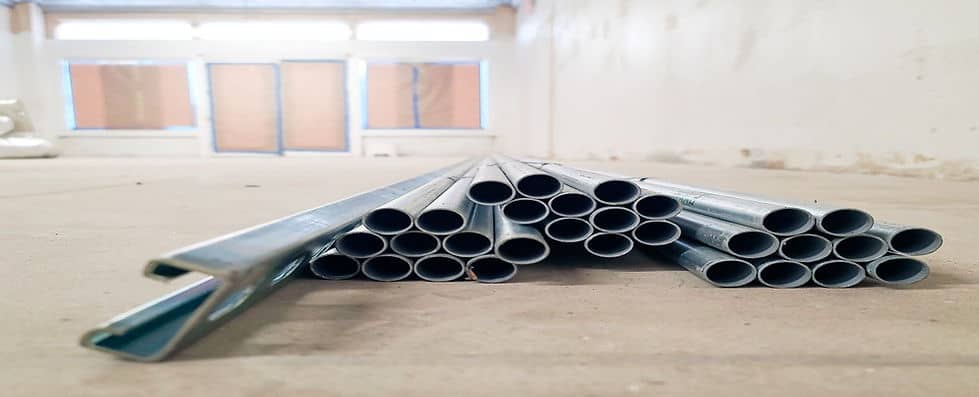
Step 1: Install the Tracks
If you’re installing a garage door, the tracks are an integral part of the process. They provide support for the entire weight of your door, so it’s important to get them just right. There are two main types of garage doors: sectional and single panel.
With sectional garage doors, you’ll need three separate tracks – one for each side and one for the top-center. Single panel garages only require two tracks – one on each side.
To begin installation, attach the vertical track securely with lag screws to both sides of your wall frame or header bracket. Make sure that all connections are snug but not overly tight, as this can damage your garage door opener mechanism.
When attaching rollers at the bottom brackets, use bolts instead of lag screws and make sure they’re firmly in place before moving onto the next step. Finally, check all connections again and tighten any loose nuts or bolts if necessary.
Step 2: Attach the Rollers to the Door
Now that the tracks are installed, it’s time to attach the rollers to the door. This is an important step in ensuring a secure and smooth operation for your garage door opener.
The first thing you need to do is lubricate each roller with some garage door lubricant before attaching it. This will reduce friction between the two surfaces and help ensure that they move freely without any problems. Make sure to apply enough lubricant on each roller so that it covers all of its contact points when attached to the track.
| Type | Material | Lubricant |
| Nylon | Plastic/synthetic | WD-40 |
| Steel | Metal | Lithium Grease |
Once you’ve applied the appropriate lubricant, you’re ready to begin installing the rollers onto the tracks. Start at one end of your garage door and work your way around until you reach the other side.
You should be able to easily slide each roller into place along both tracks until all of them are securely fastened. Lastly, make sure there isn’t too much slack or resistance while moving them as this could cause damage over time if left unchecked!
Now that we have successfully completed attaching our rollers, we can move on to installing our spring system – which determines how smoothly our new garage door opener operates!
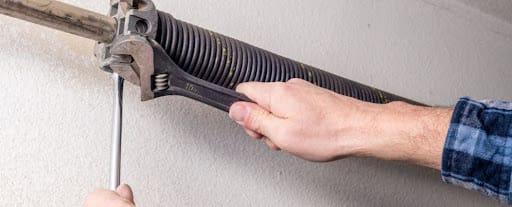
Step 3: Install the Spring System
Installing a garage door is an art form—you must understand the delicate balance between tension and release. The springs are integral to this process, as they work in tandem with the opener to provide reliable operation. In order for your install of a new garage door system to be successful, you’ll need to get these parts right from the start.
The first step is to mount the spring bracket onto either side of the frame. Use a level and make sure that it’s snugly secured into place before moving on. Then, attach the torsion tube across both brackets so that it hangs like a bridge connecting each side of the frame together.
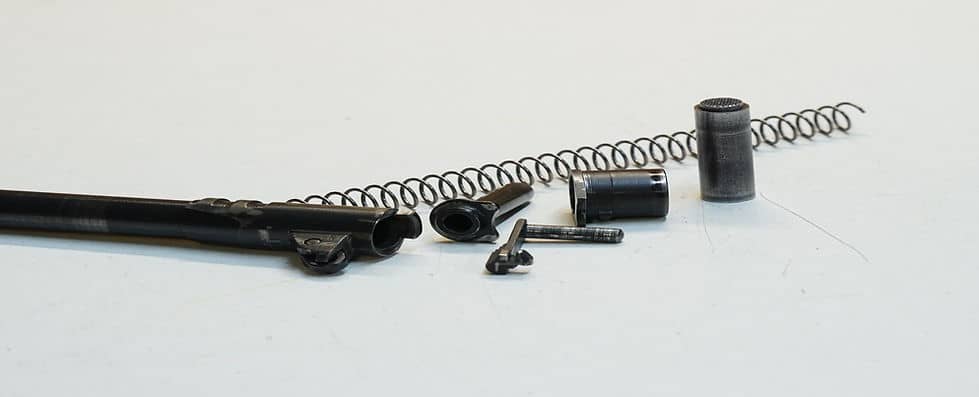
Now comes the tricky part: threading in all three springs until they’re securely wound around their respective tubes. You will have to use heavy-duty pliers or bolt cutters as well as some protective gear;the tension can easily cause injury if handled improperly.
Once everything is properly installed, adjust each spring by increasing or decreasing its tension accordingly until you achieve optimal performance when opening and closing your garage door opener. With this done correctly, you should now have a perfectly balanced garage doorway ready for many years of trouble-free service!
Step 4: Position the Torsion Tube Correctly
Now that the spring system is installed, it’s time to place the torsion tube in position. This is a crucial step in installing your garage door as it provides support and stability for the entire structure.
To start off, take two lengths of angle iron with pre-drilled holes, or “ears” and secure them onto both sides of the header wall on each side of the opening. Make sure they are secured firmly into place so they can hold the weight of your garage door properly.
Next, attach one end of the center bearing plate to each ear using two lag screws and washers on either side. Installers should use caution when driving these lags since over tightening could damage internal components. Additionally, be aware that this procedure may require additional shimming if there isn’t an even distance between ears on each side.
Finally, lift up on one end of the torsion tube until all parts fit snugly together and tighten any fasteners prior to securing cable drums and springs. The installation process has reached a critical stage; therefore it’s important that all steps are done correctly in order to ensure proper operation once finished assembling everything else.
With careful attention given to detail during placement of the torsion tube, you’ll soon have a fully operational new door!
Step 5: Secure the Cable Drums and Springs
You’ve done a great job so far – you’re almost finished! Now it’s time to secure the cable drums and springs. This step is vital for ensuring your garage door operates safely, productively and efficiently.
First, make sure that both cable drums are properly secured in place with the help of two bolts on each drum. Then attach the torsion spring winding cone onto one end of the main spring with an adjustable wrench.
Next, slide the other end of the spring over the pulley located at bottom bracket on the wall or ceiling above your garage door. Make sure to secure your cables by placing a U-bolt around them near their ends and tightening it using a socket set and ratchet.
Now you’re ready to connect your opener arm and motor unit. Don’t worry if this last part seems intimidating — just take it slow, follow all instructions carefully, and you’ll be able to complete this project like an expert!
Step 6: Connect the Opener Arm and Motor Unit
Now that the garage door is prepped and ready to be installed, it’s time to connect the opener arm and motor unit. This important step ensures your new garage door will open and close smoothly. If done incorrectly, you could end up with a broken or malfunctioning system which can lead to costly repairs down the road. So let’s get started!
First, make sure the power source for your motor is off before you start connecting any wires. Then, attach one end of the chain from the motor assembly onto the trolley connected to your opener arm. Make sure it’s secure enough so there won’t be any slipping when operating at full capacity.
Next, use screws to firmly mount the opener arm into place on top of your garage door tracks using a drill and screwdriver bit set. Finally, plug in both ends of the electric wiring harnesses into their respective outlets – one on the wall control panel and one on the back of your motor unit – ensuring all connections are tight.
In this section we discussed how to properly install an opener arm and motor unit for a new garage door installation project. The next step is adjusting force settings and limit switches so they’re optimized for smooth operation while still providing adequate protection against physical harm or injury due to improper opening or closing functions.
Step 7: Adjust the Force Settings and Limit Switches
Adjusting force settings and limit switches is an important part of a successful garage door installation. It’s like the difference between having a safe driving experience on the highway versus careening down the road with no control.
To ensure your garage door opener runs safely, let’s break down what you need to do:
- Check that all moving parts work properly
- Adjust up/down force setting levels for both open and close operations
- Make sure the close limit switch is set correctly according to manufacturer recommendations
- Program safety reverse feature if applicable
- Test for proper operation
To check that all moving parts are working properly, visually inspect each component such as springs, cables, pulleys, hinges, brackets etc., carefully looking for any signs of wear or damage.
If any components look worn out then replace them before continuing. Once everything looks good it’s time to adjust the force settings and limit switches.
First adjust the up/down forces using a wrench or screwdriver (depending on model). The goal here is to find a balance between too much pressure which can cause undue stress on its own components and not enough pressure causing strain when lifting heavier objects. Refer to your garage door openers manufacturer guidelines as these details vary from model to model.
Next set the correct closing limits so only necessary travel distance takes place during closure ensuring no obstruction comes into contact with other non-moving parts in the process.
Finally program any features specific to certain models like ‘safety reverse’ – this ensures should anything be obstructing the path while closing, it will automatically shut off preventing potential injury or damage.
Step 8: Connect the Electrical Wires Safely
Once you’ve installed the garage door opener and secured it to the ceiling, it’s time to connect the electrical wires. This is an important step in installing a garage door opener, so make sure you do it correctly. To start, turn off power at your circuit breaker panel.
Then, identify which wire connects to which terminal on the back of your garage door opener; there should be three: hot (black), neutral (white), and ground (green). Once that’s done, attach them securely with screws or other connectors provided by your manufacturer.
Make sure all connections are secure before turning on the power again – this will ensure everything runs smoothly when you use your new garage door opener for the first time. With these steps complete, you’re ready to add those finishing touches!
When to Call a Professional for Garage Door Installation
Looking for a reliable and professional garage door service provider? Look no further than Aaron’s Garage Door Company! Our experienced team of technicians is dedicated to ensuring that your garage door operates smoothly and efficiently, using only high-quality parts and equipment.
But don’t just take our word for it – give us a call and discover for yourself why we are the best in the business! We offer competitive rates, quick turnaround times, and exceptional customer service, making us the go-to choice for homeowners and businesses alike. So why wait? Contact us today to experience the Aaron’s Garage Door Company difference!